April 24, 2011
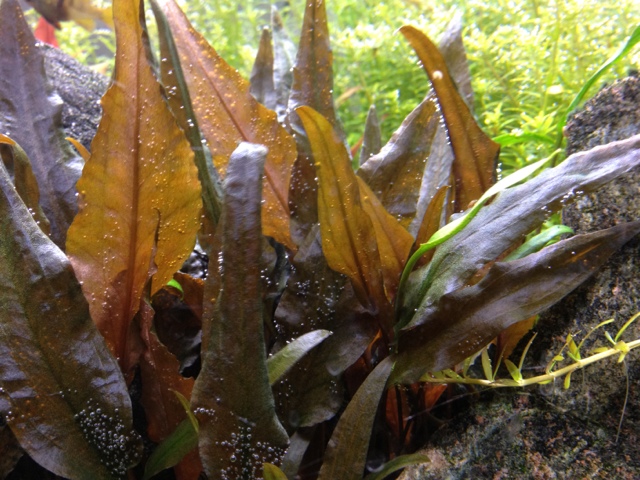
WAY too much time without an update. I have been doing more on this journal (75 gallon journal). Here are some updated photos.
(click photos for full-size, can't figure out the formating for such big pics)


October 29, 2010
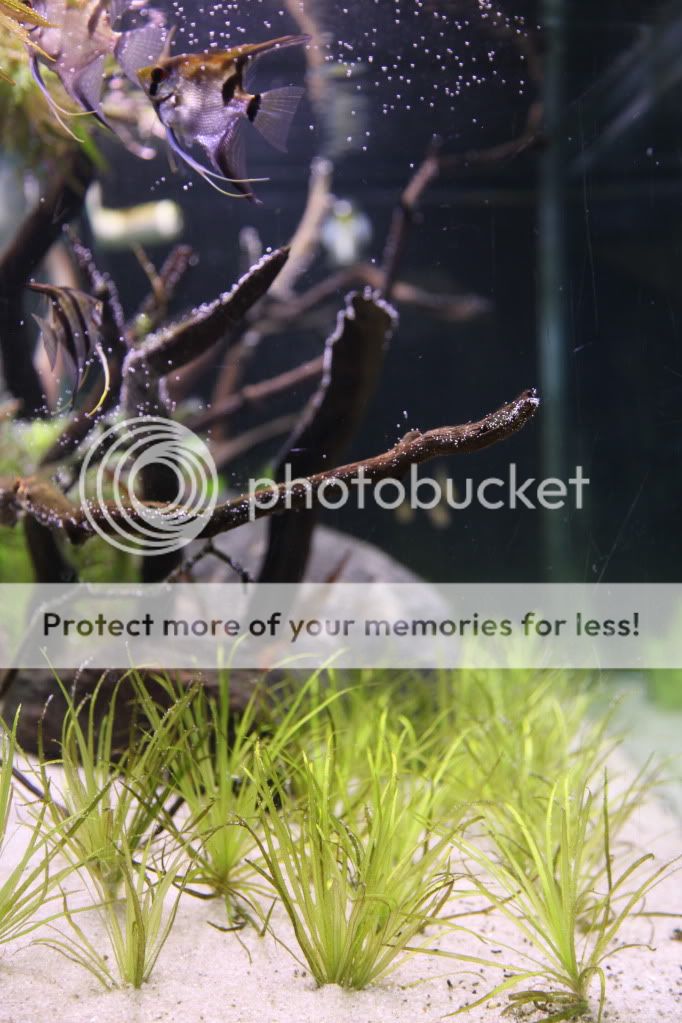
I haven't updated my blog in a while cause I have been more diligent about my online journal on plantedtank.net (75 gallon journal). Here is a bunch of pictures to catch up where I haven't updated yet.
New additions. Two juvenile super red discus.


New scape!

This is the picture of my combo inline heater/co2 reactor that I recently did to improve efficiency.
October 3, 2010

Tank after 6 days. No algae, but no incredible growth either. Lemons and rummynose all died one night. Must have cycled, really stinks. Last week I picked up a school of Cardinal Tetras. I am doing 50% water changes every 3rd day and things seem to have stabilized.
September 27, 2010
Got the tank planted!

September 23, 2010
Driftwood got here! Here is a picture of how I arranged it. Also added another school of rummynose tetras and lemon tetras. Discus are to come in the next couple of weeks...

September 16, 2010
It has been a while since I have posted because we haven't had internet in our new apartment, but we are all moved in now and started getting this bad boy going. It has been a bumpy road though....

Here is the placement in the apartment. I put an additional piece of trim that made it 3 inches tall and wider, and the doors no longer close to sit flush. It looks a lot better.

2x55 watt kit installed, waiting for 2nd to come in the mail.

View of underneath the tank. Running a Eheim 2217 and 2215. One of the tubes from the 2215 came undone and ended up putting about 10 gallons of water on the floor. That was a fun cleanup.


I made a combo DIY inline co2 reactor/heater with the heyco compression fittings and PVC and it works great. I will get some good pictures of that one day. Using a 300 watt submersible heater.
Got the tank running again and hooked up all of the filter and everything and it has been running for about a week now. I ordered plants from sweetaquatics.com and driftwood from manzanita.com. Both should be here in the next couple of days and I got a school of 8 bronze corys to start getting the tank going. Even in a bare tank they are fun to watch. I will get some more pictures up later.
August 15, 2010
Haven't updated in a while, but here is the finished product with the canopy that I didn't document at all. It was definitely the trickiest part of everything. I couldn't get the front to line up so I had to shimmy the side so it is 1/8 inch higher than the right side. I guess everything can't be perfect. I guess I have to be ok with that. After all, this is an AQUARIUM stand, and people will be hopefully looking at the fish and not the minor messups.


Aug 7, 2010
The madness continues as I still don't have a job and so I spent the last 3 entire days working on this project. We are almost done! Finished putting the frame together with all of the pieces of trim.


The whole thing is made out of pine, and I am about $125+ into this thing with everything so far, not including the canopy, which will be about another 35 or so....i am hoping atleast. Still way better than spending twice or three times that for a crappy particle board stand from petsmart.

Made the doors out of 1x4 pine boards and framed with 1x2 pine strips. They came out looking really nice, but if you look closely they arent 100% square. Good enough though.


Doors are hung (after much frusteration and tweaking), sanded, and ready to stain. We decided to go with a darker, redish color. It is minwax mahogany 225.

Only one coat and i think that might do it.


Wiped off the excess stain the next day and things are looking good. Going to put a couple layers of polyurethane over the top to give it a nice protective coating. It is turning out pretty good for my first ever woodworking project....I can't wait to get to the fish part of this though. I am looking for a used 75 (or 90) gallon tank with minimal scratches and then I can start on the matching canopy.
So finally moved out to Denver and we are starting to get settled. As I started looking a prices for stands it became apparent that I could build one for much cheaper and it would last much longer. I did my planning in Adobe Illustrator.

The more yellowish color wood is to show the pine frame. The lighter color is whitewood. It is a pretty simple design but I have had a lot of fun designing it and putting it together. The tank will sit 37 inches off the ground, with a lip of the stand coming up to 39 inches, Perfect for looking at the tank. I am hoping I can finish the tank for around $125 total. I am not nervous about the tank fitting the stand, but I am going to wait till I get the glass before I build the canopy. It will be about 8.5 inches high and will utilize a piano hinge with toy chest hinges to support it when i am doing maintenance, and feeding. My wife wants a darker looking stain on the tank, but I dont know anything about doing that.
I would like to make this into a discus tank, , with a harem of apistos, but discus are so stinking expensive it might be a little while till I have a school there. I already have 2x55 watt kit from AH supply, (going to buy one more) and a eheim 2217 canister filter. I want to go to a hydor inline heater to eliminate the clutter in the tank. Substrate will be 80 lbs of eco-complete with a Co2 injection. (not sure how I am going to diffuse...any suggestions?) Here are some pictures my wife took while I got the main structure of the stand finished.


I probably should have waited till the next day, but once i get going, it is really hard for me to stop. Finished the frame today and look to be starting the siding and doors. Also have to find a color or stain that will look good....


Holy Jeebus, Russell! That's your first woodworking project?! That stand is BAD.ASS.! Congrats!! I'm totally jealous now... And now that you've illustrated how simple it is to build your own (at least... you made it LOOK simple!) I'm totally down for doing the same in the future. I've actually got woodworking experience, so I could only hope my results could be half as awesome as yours are! Wow!
ReplyDeleteAngela
this rocks! i am also thinking of making my own fish tank for a display in my shop. this is great inspiration man.
ReplyDeleteone question how close to $125 did you come by the time you finished this project?
I really like your stand in the natural state, I think it would have looked really good with just a clear satin poly, but it still looks great and it's your prefrence, right. I would love to see an updated photo of the tank and hear about how you liked the lighting, and how it did in making the plants grow. In the original setup you had one plant that is a little difficult to grow Alternanthera Reineckii Var. Roseafolia and you removed it after an algae problem, did you ever try this plant again?
ReplyDeleteI think I finished both stand and canopy for a bit over $200...so not my plan, but it was a good learning experience. I can't remember why I got rid of the alternathera, but i think it was because of algae. I am liking how things look right now though for sure. Thanks for looking and your comments!
ReplyDeleteWow. Really an inspiration to me, a beginner hobbyist, to get into planted aquariums. Yours looks AMAZING.
ReplyDelete